 |
RC Helicopter Set-up by HollyHeli (John Wilson) |
|
RC Helicopter Set-up by HollyHeli (John Wilson) |
Before we can sensibly talk about RC heli set-up, we need some basic agreement on how they fly and why they are designed the way they are. I will only address the aerodynamic controls and associated mechanics. Skip this section if you are completely comfortable with all that stuff. I will not talk about the radio control aspects, other than the Tx controls used to fly the heli, since things like channel allocation and CCPM will be dealt with later, under radio and servo set-up.
Some people say that, unlike fixed wing aircraft, helicopters don't really fly, they just make so much noise and commotion that eventually the earth rejects them and throws them up into the air, which they then proceed to beat into submission. Well, perhaps there is some truth in that.
A fixed wing aircraft generally has an elegantly shaped wing, often using an asymmetrical aerofoil cross section, angled up at the front. In very simple terms, provided there is forward motion, the airflow is deflected and pushes more on the lower surface of the wing, also the velocity of airflow over the top of the wing increases; the nett effect is a pressure differential - lift.
A heli's wing is its main rotor blades (two on most small models) and it makes its own airflow, which is why a heli can fly without going anywhere. Commonly, RC helis have a thin symmetrical cross section blade to reduce drag and allow inverted flight. Heli blades are seldom any more elegant than a paint stirrer.
A FP rotor head has the blades permanently set at a suitable positive pitch (angle) or 'angle of attack', so lift only increases as head speed does.
A CP heli runs at a more or less constant head speed and the 'collective' blade pitch controls lift. Most RC heli heads rotate clockwise (seen from the top) and all blades must tilt up at the leading edge (positive blade pitch angle) to generate upward lift. However, unlike on FP, the leading edge can tilt down (negative blade pitch angle) to provide a quick descent (even when wind causes translational lift) or allow inverted flight. Fortunately, most full size helis do not have that last feature. Some people wish RC helis didn't either.
On a CP heli, when the blades are angled flat and rotate, the air flows symmetrically above and below and there is no lift. This is called the 0 degrees (deg) pitch (angle), an important datum measured relative to the horizontal (provided the main drive shaft is vertical), used in set-up.
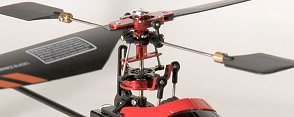
To control the pitch angle of a rotating pair of blades takes a bit of ingenious engineering. There is a clever device in the head assembly called a swashplate. This is actually two plates looking like two rings held together by a large bearing.
The upper ring rotates with the rotor head and the lower one doesn't, but one ring always follows the other precisely in height and tilt (unless it is made by Esky). The non-rotating ring is positioned (usually) by servo links attached to little ball joints (usually three), which allow it to be moved precisely. As you should already know from the definitions link, servos are the little motors that translate the control signals from the Rx to the swashplate and tail pitch control.
The upper swashplate ring also has ball joints (usually four) allowing links to connect to the rotating main rotor head (see Section 4). These links indirectly control the angle of the main blade grips and so can alter the angle of attack of the blades – the pitch.
In a CP heli, the whole swashplate can move up and down and cause the blade pitch to increase or decrease – the two blades always change pitch in opposite angular directions because they are mounted opposite each other. In the animation above, the blade pitch is going from 0 deg to full positive pitch, then through 0 deg to full negative pitch etc.
The essential idea is that while the swash is at a particular height, the blade pitch stays the same throughout each 360 deg rotation of the head. It is important that both blades have the same pitch at any instant. This is covered in Section 9 under 'main blade tracking'.
Above is a view 'tail-in'; as you can see, it is only the blades that are changing angle when the collective pitch control alone is used. You can now clearly see the swashplate anti-rotation pin moving up and down in its slot.
There is a big down-side to having a whopping great rotor head and blades whizzing around (typically at 2000 rpm). Thanks to Newton's third law (trust me, I'm a physicist), if the blades go around clockwise (seen from above), then once the heli leaves the ground and there is no friction, the fuselage will want to rotate anticlockwise (seen from above – well we might see it going clockwise from below in the few seconds before it crashes). Co-axial helis get around this by having a second main rotor rotating the opposite way; the ones that are more fun to fly use a tail rotor instead.
The tail rotor, if set up correctly, pushes the tail to the left (seen from behind – 'tail-in'), countering the torque from the main rotor and also allows the pilot to apply rudder (side to side movement of the left-hand Tx stick in Mode II) to yaw or rotate the heli deliberately.
On a full size heli, the rudder pedals are sometimes referred to as 'anti-torque' controls.
On a model heli, rudder control is usually achieved with an additional (high speed) servo mounted on the boom, which operates the tail rotor pitch slider (via a long control link running parallel to the heli's boom), thus altering the pitch of the rotating tail rotor to make it push more or less.
Small helis with a fixed pitch tail rotor use the tail rotor speed to achieve the same effect.
In 'neutral' trim, the tail rotor exactly balances the main rotor torque. Right rudder stick increases the tail rotor pitch (or speed) to 'beat' the torque, pushing the tail to the left, so the nose goes right (starboard). Left rudder has the opposite effect, allowing the torque to turn the nose to port in a controlled fashion.
Tail rotors usually rotate so that the blade nearer to the nose of the heli is going up into the downward main rotor wash (anticlockwise as seen from the starboard side) because this works better. The tail rotor in a belt or 'torque tube' driven tail rotates at higher RPM than the main rotor, but in a fixed ratio to the main head speed. Separate tail motors do the same, but in the absence of a mechanical coupling there is an electronic link between main rotor RPM and tail rotor RPM.
All this sounds fine, but there are some complications. Firstly, even when the heli is hovering stationary with no yaw, the tail rotor pitch is not zero, it is biased or offset by several deg to give sufficient push to counter the main rotor torque. So, if the tail pitch slider control is set with zero pitch in the middle of the range, there will be less control available for starboard rudder compared to port. However, although this has some set-up implications (see ChopperAddict's 'How to set up the tail rotor blade position on almost any helicopter'), it isn't as big a problem as the reduced tail authority in left turns, particularly on small helis with FP tail rotors.
More importantly, when the pilot decides to do a spectacular climb-out to impress his/her mates/girlfriend/boyfriend/partner(?), what happens? The main blade pitch whams up from say 6 deg to 10 deg and so does the torque trying to spin the heli out of control. This is why most people these days use a tail gyro to help them out.
The gyro takes over some of the tail rotor pitch (or speed) control from the pilot when it thinks he/she needs some help and prevents an undemanded yaw or pirouette. See ChopperAddict's 'All you ever wanted to know about how gyros work' and 'What gyro setting should you use when learning to hover'. The really clever 'head hold' gyro (see Section 6) even knows when the wind starts to blow the tail around and prevents 'weathervaning'.
One final problem with a tail rotor, which makes single main rotor helis so interesting and challenging, is that the tail rotor is always trying to push the heli sideways; to the left seen from the 'tail-in' view for a clockwise rotating main rotor. This is particularly noticeable on takeoff. Also, because the tail rotor spindle is usually lower than the plane of the main rotor, there is a force generated that slightly tilts the heli once it's off the ground. All this needs to be recognised when it comes to trimming a heli for flight (and flying it of course).
So far, so good. The heli hovers and goes up and down (collective pitch or head speed on FP, left-hand Tx stick up/down in Mode II) and can yaw or rotate when required (rudder, left-hand Tx stick side-to-side).
But has your heli got attitude as well as altitude? How do we bank or pitch it? It wont hover for long if we can't because it's inherently unstable and also we need this for translational motion such a fast forward flight.
The attitude controls are commanded by the cyclic (movement in any direction of the right-hand Tx stick in Mode II) and have a close equivalent on a fixed wing aircraft; the elevator (nose up/down) and ailerons (port/starboard bank). The cyclic pitch control operates on the main rotor blade pitch in addition to the CP adjustments already mentioned. I think that cyclic pitch is by far the hardest idea to get your head around when you are new to helis, so I'll spend several paragraphs trying to explain it.
Let's first briefly revisit collective pitch. When the swashplate in a CP heli moves up and down (in response to raising and lowering the left-hand stick on a Mode II Tx) the pitch angle of the main rotor is altered to control the degree of lift and its direction. Remember, at a particular collective setting, the blade pitch angle remains constant throughout each rotation of the head.
So, how do you make the heli tilt like a fixed wing aircraft with elevators and ailerons? Simple, tilt the swash the way you want the heli to go using the cyclic control (right-hand Tx stick). This causes a different sort of movement of the blades compared to the collective pitch control. Now concentrate! Imagine the collective pitch is at 0 deg and the cyclic is centered. The blades will be at 0 deg throughout their 360 deg rotation.
If you want to pitch the heli forward by pushing the cyclic forward, both blades need to tilt forward, a bit like elevators (but not quite – I'll return to this) and this needs to happen most at the moment in the rotation when they are at right angles to the heli's boom (so they are a bit like tilting wings).
Conversely, to pitch the heli backward, they can be tilted back, but the two blades must always act together in the same angular direction, as if joined by a rigid shaft, unlike the 'mirror image' collective pitch.
The flybar paddles will be at 0 deg at this point, their slight movement in the animation is only because I couldn't clamp the flybar still, as in the side-on pictures (the clamp would spoil the view).
However, as the head continues to rotate, we want less elevator tilt on the blades, or the heli's pitch movement will become a bank, so by the time the blades have rotated to their fore and aft position (in line with the boom), as in the animation above, they must no longer be controlled by the elevator input and in our scenario with the collective pitch at 0 deg and only elevator cyclic applied, they will be at 0 deg again. Note, however, that the flybar paddles are now operating like elevators (see above).
If you want to bank port or starboard using left or right cyclic, the blades need to tilt most when in line with the boom (as in the next photo), so that they angle to the left or right depending on the bank direction required – again, they always work together, as if rigidly connected.
The side view shows that the flybar paddles remain level when at right angles to the boom, but they tilt like ailerons when they rotate in line with the boom.
Of course, there cannot be a rigid connection, each blade grip must simultaneously move independently for collective pitch, but also, as the rotor goes around, the blades trade elevator control for aileron, or aileron control for elevator, every 90 deg. They cycle between maximum elevator and aileron input twice each revolution – hence 'cyclic' (think 'flap').
When the blades are rotating fast, the pitch changes caused by the elevator and aileron (controlled by the right-hand Tx cyclic stick) take on the appearance of a tilting disk.
This is a quick way of checking correct set-up prior to take off (however, it's better to check the swash movement prior to spool-up as well!).
The collective pitch setting is added to or subtracted from (modulated) by the cyclic pitch inputs as the swash moves up and down and simultaneously tilts. A FP heli only has the swash tilt movement, not the up and down.
Just a footnote, before a 'plank' flier has a go at me. The tilt of the heli blades actually goes in reverse to an elevator because they are at the centre of gravity of the heli, not at the back. Any control surface tilt on a 'plane's tail is sort of reversed by the lever effect acting on the centre of gravity i.e. if the elevator tilts up at the back the tail goes down but the 'plane goes up. I forgot this when setting up the ailerons on my first fixed wing project, only having flown helis and (imagining them like fixed wing aircraft elevators – heli blades don't help) got them reversed! My first flight ended in an inverted landing.
The last complication, which you don't get on full size helis (at least not in the same form), is the flybar and paddles. That's the thing at right angles to the main blades, above or below their level (below is better). Without a flybar or its electronic equivalent on a 'flybarless' machine, a small RC heli would be even more difficult to fly than they already are – why?
Well, a model heli has much smaller blades than a full size one and is much lighter overall, however, the density and viscosity of the air that causes pressure and resistance is not scaled at all (it's the same air that all helis use). As a consequence, RC models often have proportionately wider blades than full size helis, which is likely to make them more sensitive to changes in blade angle, making them more 'twitchy' to fly. In addition, the head speed of a small RC heli can be up to 10 times higher than a full size one and the power to weight ratio of a model is generally much greater than for a full size helicopter. A full size heli, besides having slower thinner blades, has much more mass and therefore inertia, so it reacts to aerodynamic forces, such as wind or turbulence and to control inputs, more sluggishly, giving the pilot longer to react. Also, the pilot has motional feedback to help him/her fly it, whereas the RC pilot only has visual clues (until the heli is just a dot in the distance, then...).
No helicopter is stable, as in self-righting (unless electronically stabilised using 3-axis gyros or optics), but a model can be made more controllable, so it seems more stable (important distinction). This is where the flybar comes in. Most CP RC helis use a 'Bell-Hiller' mechanical mixing system.
Once the head is rotating, the flybar tries to stay in the same plane, at the same angle to the ground, because of its rotational inertia (there may also be flybar weights) and the aerodynamic force on the flat paddles (which generate no lift, by the way). So when the heli tries to tilt, the links from the flybar (the Hiller bit) act directly on the main blade pitches to counter the tilt (negative feedback in engineering parlance).
Also, when the pilot applies aileron or elevator, the paddles are tilted indirectly from the swashplate via the Hiller linkage, so the flybar can transfer pilot commanded pitch changes to the main blades. However, the effect on the flybar is offset 90 deg from the blades (90 deg out of phase).
So, if the blades are aligned fore and aft, the aileron tilts them, but the elevator doesn't (see above). However, the elevator does tilt the flybar paddles in this position because they are in the 'little wings' orientation. Conversely, when the head rotates so the blades are sticking out to each side and acting as elevators, the paddles act like ailerons, because the flybar is at that moment parallel to the heli's axis.
Since the fly bar paddles are not supporting any of the heli's weight, they can be quite responsive despite their small size. The result of all this is to provide pitch control from the lightly loaded flybar, which also provides damping, making the cyclic less 'twitchy'. Some FP flybar designs also assist the maneuver (power steering), taking some strain off the servos. With a Hiller only set-up, the downside is a slight delay in the pilot's cyclic input because of the 90 deg offset. To get around this delay in response, there is usually a more direct link from the swashplate to the blade pitch control (the Bell system used on most full-size helis) via a mixing arm. The control arms are dimensioned to give the optimal mix of Bell and Hiller input.
This sort of stuff has a habit of getting a bit complicated, but all you need to know for set-up (having secured the paddles at 0 deg in line with the main blades) is that when you set up the main blade pitch, you do the angle measurements relative to the flybar, if using a simple pitch gauge, or make sure the flybar is held level, if using fancy pitch gauges that use gravity (more in Section 9).
A flybarless RC heli has a much simpler mechanical head arrangement, more like the Bell linkage on a full size machine (which makes it ideal for 'scale' models). To make it flyable, an electronic system incorporating several gyros is needed and this performs a similar function to the missing mechanical flybar. The main difference with regard to set-up is that there is no flybar to measure blade pitch relative to and the Tx trim functions may be inefffective. Once the basic mechanical set-up is complete, electronic adjustments must be made on the flybarless controller to adjust the way the heli flies.
Additional damping is provided on both types of head by rubber or plastic dampers on the feathering shaft. If the feathering shaft were rigidly mounted in the rotor head, the heli would probably shake itself apart due to slight imbalances, so the shaft is allowed a little movement ('teeter') but is constrained by two compliant dampers. This allows the blades to 'flap' slightly in the vertical direction as the feathering shaft teeters and this equalises the effects of 'lift dissymmetry' resulting from the different relative air speed over the advancing and retreating blades during transitional flight.

On small helis these dampers look like 'o' rings, slipped over the feathering shaft; on larger machines they look more like grommets. Dampers come in different flavours and need to be considered during set-up (Section 10). Full size helis usually have separate flapping hinges on each rotor blade mounting, rather than the simpler 'teetering head' arrangement found on most models.
This section has turned into a bit of a marathon. Finally (gasp!) the main rotor head speed can affect stability. My Trex 500 used to nod its head up and down as the battery voltage waned, as if warning me all was not well. In fact, slightly increasing the head speed cured this, allowing additional stable flight time well within the battery capacity. Putting in softer dampers may have provided an alternative cure, but I liked the way it flew and changing the throttle curve was much less work!
<1 A main rotor blade's angle of attack (collective pitch) controls lift.
<2 The tail rotor balances the twist from the main rotor with the gyro's help; it's also the rudder.
<3 A heli needs attitude, the cyclic tilts it by flapping the blade pitch every revolution.
<4 Tilting the swashplate controls cyclic pitch; raising and lowering it controls collective pitch.
<5 RC helis are squirrelly and need mechanical or electronic flybars for damping.
<6 Helis seem complicated but set-up doesn't have to be.
Go to next section – 3. Tools & Safety >
4 Head 5 Radio 6 Tail 7 Motor 8 Blades 9 Pitch 10 Test 11 Def 12 Stuff >>
<<< ChopperAddict home <<< GatleyGallery RC Helis
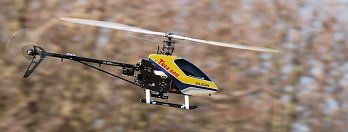
© John E Wilson 2011 with thanks to my friend and colleague Bill Boley for the in-flight photo.